


HEY so this month is mostly dedicated to my ladies. So fellas, NO GUYS ALLOWED....not unless you're here “looking” or just happened to be "googling." But in either case, go get the lil woman coz I wanna talk to her ^_^ *lol*.
So like I said I was going to dedicate this month to doing it yourself ladies. Coz if we can spend BUKU MONEY on our >NEEDS< then dammit we can do it ourselves right?? TOTALLY!!! Yea the white gurl popped out for a quick moment but in the words of Stewart Gilligan Griffin: Who gives a damn?? This is Wish Williams being Wish Williams ;D.
Now I know I’m not the only chick out there who loves to get her nail done. We mostly do it to actually spend a day at being pampered or becoz (like me) we’re WAY to lazy to grow thru the aggravation…am I right or am I right?? So HAVE NO FEAR Wishipoo is here!!!! =D. I’mma give you the DO’s and DON’T’s to where, when, how, what, why on nails. Don’t panic and scream I DON’T KNOW WHAT I’M DOING!!!?!??!?! Hell if you know how to use nail polish babe…you’re 1/4 of the way there ^_^, trust me!
So you know the basics of polishing your nails one whole color right??
Clean hands and nails well (soap & water or antibacterial hand sanitizer) [optional unless hands are dirty or oily]
- A few cotton balls or rounds (yea I said rounds, even though mostly used for make up they’re great for cleaning nails or removing polish!!)
- A bottle of nail polish remover / 100% Acetone (my favs are the Onyx line, but as far as acetone I like the eco friendly one I got I’ll get you the name of it later)
- And your favorite nail polish and base & top coat (there’s plenty of colors out there I like NYC color, china glaze, ultra pro and as for top/base coat I love the Seche Vite line)
Procedure is simple. Clean the nail bed, push back the cuticle (gently or it will cut, hurt or bleed) and apply a base coat (it would be Seche Vite Crystal Clear base coat). Now don’t worry if it looks all grainy or rough. Its perfectly alright and wont affect the next few steps.
Then get you’re favorite nail p0olish. Most of the crazy obscene colors I brought came from Sally’s Beauty Supply (http://www.sallybeauty.com/) very cheap and great colors for your money. So get a good bit on the brush not TOO much coz it will and CAN go everywhere. My personal technique is to get a small dot or drip and place it in the middle of your nail. Then dip the brush back into the bottle and remove the excess polish or enamel in some cases and spread it over your nail. It doesn’t need to be THICK because you can always go back and apply a second coat.

Now for my ladies who are a total KLUTZ and get more of it on their fingers and body than the nail, like I do. Grab a cotton round and put a little bit of acetone in the middle of the round and fold it in half (itll look like HALF a pie or circle) and then fold in half once more (look like a upside down ice cream cone or oddly shaped triangle) now take the tip that comes to a nice point and clean up those edges and cuticles that got nail enamel on them ^_^. It happens and no body’s perfect. And after that little clean up get some lotion or oil and apply on hands to get rid of the dryness.
So now we know how to do that right?? Simple & easy hmm =). Well…lets try doing a DESIGN spice it UP a bit.


Sally Hansen Insta-dri Nail Color - 24 - Night Flight
Nicole by O.P.I. Love Your Life
Seche Vite Crystal Clear Basecoat & Dry Fast Topcoat

Base coat

Top coat
Top coat
Now we’re ready. What’s fun and best about this design is that you can do black for a few weeks and then spice it up or KICK IT UP A NOTCH *lol* with the Love Your Life.
- Steps!
- Unlike the ball/drip technique in this case it’s not needed.
- Get you’re Sally Hansen Night Flight (black) enamel and remove the cap and excess enamel (not to MUCH THO!!)
- Just swipe it across your nail(s). Make sure the whole nail is at least covered, because after you swipe it, it’ll start to dry
- Repeat last step on the other hand (or one at a time if you’re not comfortable with that just yet but remember PRACTICE MAKES PERFECT…somewhat lol)
- Let your nails dry regardless because it can seem dry and as soon as you TOUCH it you’ll have a FORENSIC NAIL PRINT or a crinkled paper smudge =P.
- Now apply a coat of the Seche Vite Dry Fast Topcoat. Let dry 5-8 minutes.
- Repeat last step on other hand (if not doing both at the same time, skip to the next step)
Applying the Décor!
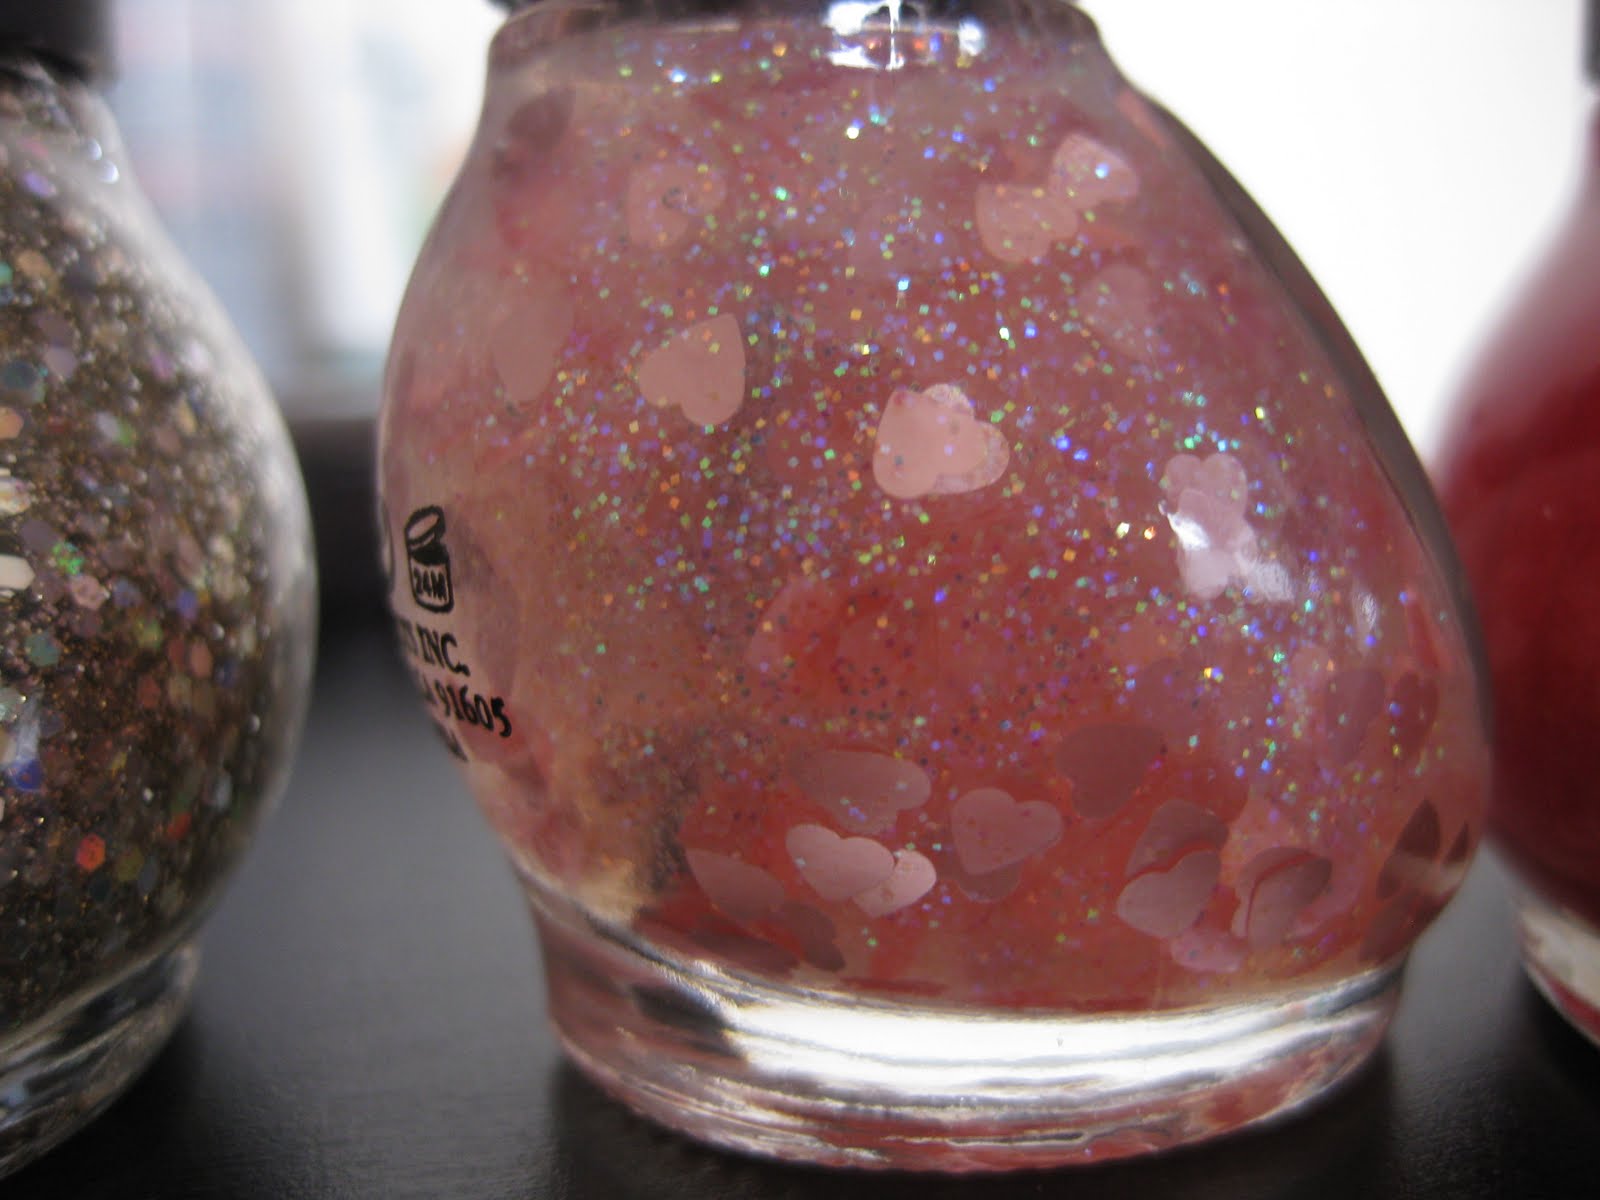
- Now here is a CLOSE UP on Love Your Life. It’s a clear polish or enamel with glitters and these cute little hearts. However it’s complex to get a heart on the brush so you kinda have to FISH or HOOK it.
- Now try to get you a heart or two on your brush. Don’t worry it’ll take a while so take your TIME ALWAYS!!
- Once you have a heart on the brush place it on your nail where ever you want it and gently brush over it so that it wont move or get stuck and disappear.
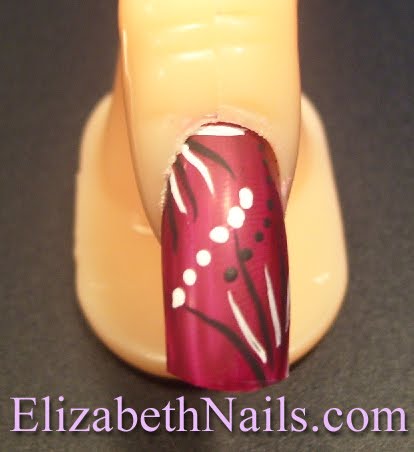
- Do the design however you like ^_^ I did mine like dice sorta while the girls in these pictures did theirs like a designed TIP or just two finger design.


And VOILÀ! You got a CUTIE PATOOTIE Design that ppl will be asking and complementing you about!! What’s fun about this design you can use any color as a BACKGROUND. And you can name it whatever you WANT!! That’s the fun =D hehe, which is where Love Your Emo Life came from.
Now I hope this HELPED, and gave you a little confidential BOOST to say HEY I wanna do my OWN NAILS!!! Before you know it with my School Program lol you’ll be able to look at a design and do it yourself ^_^
Something like this make look hard now but by time the summer comes, you’ll be like: PHBT!!! EASY AS SLICIN COOKIES CAKE & PIE MY MAN (or chick lol).
Next Week!
We’ll talk about how to do basic and moderate designs using Nail Art Paints or Stripers ^_^ any QUESTIONS COMMENTS or SUGGESTIONS EMAIL ME (click the button at the top by the HOME BUTTON) with the SUBJECT: DIY Sauni Rue!
All images are all ©®
http://acrylicnail.net/tag/nail-art/ ©®
“Love Your Emo Life” is a Wish Williams©®
http://watercoloursky.blogspot.com/2009/04/sephora-benefit-gwp-and-nails.html
http://e-polishblog.blogspot.com/2009_02_01_archive.html
http://pinkberrii.blogspot.com/2009/11/nicole-by-opi-loreal-hip-metallic-duo.html
http://forum.purseblog.com/the-beauty-bar/what-nail-polish-are-you-currently-wearing-184248-277.html http://acrylicnail.net/tag/nail-art/ ©®
“Love Your Emo Life” is a Wish Williams©®


0 comments :
Post a Comment
What do you think?